cd ~/ffmpeg_sources curl -O -L https://www.nasm.us/pub/nasm/releasebuilds/2.14.02/nasm-2.14.02.tar.bz2 tar -xjvf nasm-2.14.02.tar.bz2 cd nasm-2.14.02 ./autogen.sh ./configure –prefix=”$HOME/ffmpeg_build” –bindir=”$HOME/bin” make make install
cd ~/ffmpeg_sources curl -O -L http://www.tortall.net/projects/yasm/releases/yasm-1.3.0.tar.gz tar -zxvf yasm-1.3.0.tar.gz cd yasm-1.3.0 ./configure –prefix=”$HOME/ffmpeg_build” –bindir=”$HOME/bin” make make install
cd ~/ffmpeg_sources git clone –depth 1 http://git.videolan.org/git/x264cd x264 (or) wget http://download.videolan.org/pub/videolan/x264/snapshots/last_x264.tar.bz2 tar -jxf last_x264.tar.bz2 cd x264-snapshot-20190530-2245-stable PKG_CONFIG_PATH=”$HOME/ffmpeg_build/lib/pkgconfig” ./configure –prefix=”$HOME/ffmpeg_build” –bindir=”$HOME/bin” –enable-static make make install
Open the console and add the migration to create the User table
yii migrate/create create_user_table
Open the file with the migration /migration/m000000_000000_create_user_table.php and add the code for creating the migration, we will not reinvent the wheel, and we will do the same as in the version advanced:
<?php use yii\db\Migration; class m000000_000000_create_user_table extends Migration{ public function up() { $tableOptions = null; if ($this->db->driverName === 'mysql') { $tableOptions = 'CHARACTER SET utf8 COLLATE utf8_unicode_ci ENGINE=InnoDB'; } $this->createTable('user', [ 'id' => $this->primaryKey(), 'username' => $this->string()->notNull()->unique(), 'auth_key' => $this->string(32)->notNull(), 'password_hash' => $this->string()->notNull(), 'password_reset_token' => $this->string()->unique(), 'email' => $this->string()->notNull()->unique(), 'status' => $this->smallInteger()->notNull()->defaultValue(10), 'created_at' => $this->integer()->notNull(), 'updated_at' => $this->integer()->notNull(), ], $tableOptions); } public function down() { $this->dropTable('user'); } }
After saving the edits in the migration file (copy only the methods code up() and down()), execute it in the console:
yii migrate
Edit model /models/User.php:
<?php namespace app\models; use Yii;use yii\base\NotSupportedException;use yii\behaviors\TimestampBehavior;use yii\db\ActiveRecord;use yii\web\IdentityInterface; /** * User model * * @property integer $id * @property string $username * @property string $password_hash * @property string $password_reset_token * @property string $email * @property string $auth_key * @property integer $status * @property integer $created_at * @property integer $updated_at * @property string $password write-only password */class User extends ActiveRecord implements IdentityInterface{ const STATUS_DELETED = 0; const STATUS_ACTIVE = 10; /** * @inheritdoc */ public static function tableName() { return '{{%user}}'; } /** * @inheritdoc */ public function behaviors() { return [ TimestampBehavior::className(), ]; } /** * @inheritdoc */ public function rules() { return [ ['status', 'default', 'value' => self::STATUS_ACTIVE], ['status', 'in', 'range' => [self::STATUS_ACTIVE, self::STATUS_DELETED]], ]; } /** * @inheritdoc */ public static function findIdentity($id) { return static::findOne(['id' => $id, 'status' => self::STATUS_ACTIVE]); } /** * @inheritdoc */ public static function findIdentityByAccessToken($token, $type = null) { throw new NotSupportedException('"findIdentityByAccessToken" is not implemented.'); } /** * Finds user by username * * @param string $username * @return static|null */ public static function findByUsername($username) { return static::findOne(['username' => $username, 'status' => self::STATUS_ACTIVE]); } /** * @inheritdoc */ public function getId() { return $this->getPrimaryKey(); } /** * @inheritdoc */ public function getAuthKey() { return $this->auth_key; } /** * @inheritdoc */ public function validateAuthKey($authKey) { return $this->getAuthKey() === $authKey; } /** * Validates password * * @param string $password password to validate * @return bool if password provided is valid for current user */ public function validatePassword($password) { return Yii::$app->security->validatePassword($password, $this->password_hash); } /** * Generates password hash from password and sets it to the model * * @param string $password */ public function setPassword($password) { $this->password_hash = Yii::$app->security->generatePasswordHash($password); } /** * Generates "remember me" authentication key */ public function generateAuthKey() { $this->auth_key = Yii::$app->security->generateRandomString(); } }
Authorization is ready, now we will add a user to check authorization. Open the controller /controllers/SiteController.php and add the action to the end of the controller which will help us add the user:
public function actionAddAdmin() { $model = User::find()->where(['username' => 'admin'])->one(); if (empty($model)) { $user = new User(); $user->username = 'admin'; $user->email = 'admin@devreadwrite.com'; $user->setPassword('admin'); $user->generateAuthKey(); if ($user->save()) { echo 'good'; } }}
Run the action: site.com/web/index.php?r=site/add-admin and check the authorization site.com/web/index.php?r=site/login
After successful authorization, the AddAdmin action can be deleted as a useless item.
If you only need authorization via a database in Yii2 basic, then you can end this. If in addition to authorizing through the database on the site you need to add registration and password recovery, then continue.
Add registration to the site in Yii2 basic
First, create a model for the registration forms, for this you need to create a file /models/SignupForm.php with the following content:
<?ph namespace app\models; use Yii;use yii\base\Model; /** * Signup form */class SignupForm extends Model{ public $username; public $email; public $password; /** * @inheritdoc */ public function rules() { return [ ['username', 'trim'], ['username', 'required'], ['username', 'unique', 'targetClass' => '\app\models\User', 'message' => 'This username has already been taken.'], ['username', 'string', 'min' => 2, 'max' => 255], ['email', 'trim'], ['email', 'required'], ['email', 'email'], ['email', 'string', 'max' => 255], ['email', 'unique', 'targetClass' => '\app\models\User', 'message' => 'This email address has already been taken.'], ['password', 'required'], ['password', 'string', 'min' => 6], ]; } /** * Signs user up. * * @return User|null the saved model or null if saving fails */ public function signup() { if (!$this->validate()) { return null; } $user = new User(); $user->username = $this->username; $user->email = $this->email; $user->setPassword($this->password); $user->generateAuthKey(); return $user->save() ? $user : null; } }
Next, in /controllers/SiteController.php in use, add registration model SignupForm and action signup:
<?php namespace app\controllers; //... use app\models\LoginForm;use app\models\ContactForm;use app\models\SignupForm; class SiteController extends Controller{ //... public function actionSignup() { $model = new SignupForm(); if ($model->load(Yii::$app->request->post())) { if ($user = $model->signup()) { if (Yii::$app->getUser()->login($user)) { return $this->goHome(); } } } return $this->render('signup', [ 'model' => $model, ]); } }
Next, you need to add a view for registration, add a file /views/site/signup.php with the following content:
And the last thing you need to do is add registration to the menu. Open the file /views/layouts/main.php find the menu widget and add the registration item, after which the widget with the following form:
Now we have registration and authorization in Yii2 basic.
For full functionality only need to do reset and password recovery.
Add password recovery on the site in Yii2 basic
First, you need to modify the /models/User.php model and add several methods to create and reset the token of password:
public static function findByPasswordResetToken($token){ if (!static::isPasswordResetTokenValid($token)) { return null; } return static::findOne([ 'password_reset_token' => $token, 'status' => self::STATUS_ACTIVE, ]);}public static function isPasswordResetTokenValid($token){ if (empty($token)) { return false; } $timestamp = (int) substr($token, strrpos($token, '_') + 1); $expire = Yii::$app->params['user.passwordResetTokenExpire']; return $timestamp + $expire >= time();}public function generatePasswordResetToken(){ $this->password_reset_token = Yii::$app->security->generateRandomString() . '_' . time();}public function removePasswordResetToken(){ $this->password_reset_token = null;}
As a result, the model /models/User.php will look like this:
<?php namespace app\models; use Yii;use yii\base\NotSupportedException;use yii\behaviors\TimestampBehavior;use yii\db\ActiveRecord;use yii\web\IdentityInterface; class User extends ActiveRecord implements IdentityInterface{ const STATUS_DELETED = 0; const STATUS_ACTIVE = 10; public static function tableName() { return '{{%user}}'; } public function behaviors() { return [ TimestampBehavior::className(), ]; } public function rules() { return [ ['status', 'default', 'value' => self::STATUS_ACTIVE], ['status', 'in', 'range' => [self::STATUS_ACTIVE, self::STATUS_DELETED]], ]; } public static function findIdentity($id) { return static::findOne(['id' => $id, 'status' => self::STATUS_ACTIVE]); } public static function findIdentityByAccessToken($token, $type = null) { throw new NotSupportedException('"findIdentityByAccessToken" is not implemented.'); } public static function findByUsername($username) { return static::findOne(['username' => $username, 'status' => self::STATUS_ACTIVE]); } public static function findByPasswordResetToken($token) { if (!static::isPasswordResetTokenValid($token)) { return null; } return static::findOne([ 'password_reset_token' => $token, 'status' => self::STATUS_ACTIVE, ]); } public static function isPasswordResetTokenValid($token) { if (empty($token)) { return false; } $timestamp = (int) substr($token, strrpos($token, '_') + 1); $expire = Yii::$app->params['user.passwordResetTokenExpire']; return $timestamp + $expire >= time(); } public function getId() { return $this->getPrimaryKey(); } public function getAuthKey() { return $this->auth_key; } public function validateAuthKey($authKey) { return $this->getAuthKey() === $authKey; } public function validatePassword($password) { return Yii::$app->security->validatePassword($password, $this->password_hash); } public function setPassword($password) { $this->password_hash = Yii::$app->security->generatePasswordHash($password); } public function generateAuthKey() { $this->auth_key = Yii::$app->security->generateRandomString(); } public function generatePasswordResetToken() { $this->password_reset_token = Yii::$app->security->generateRandomString() . '_' . time(); } public function removePasswordResetToken() { $this->password_reset_token = null; } }
The method of checking token of password reset isPasswordResetTokenValid uses the variable user.passwordResetTokenExpire to reset password token, it must be specified in the file /congif/params.php:
Next, you must add the request form model to change the password and the password change form model. Total 2 models. First, we’ll add the model of the request form to change the password /models/PasswordResetRequestForm.php with the following content:
<?php namespace app\models; use Yii;use yii\base\Model; /** * Password reset request form */class PasswordResetRequestForm extends Model{ public $email; /** * @inheritdoc */ public function rules() { return [ ['email', 'trim'], ['email', 'required'], ['email', 'email'], ['email', 'exist', 'targetClass' => '\app\models\User', 'filter' => ['status' => User::STATUS_ACTIVE], 'message' => 'There is no user with such email.' ], ]; } /** * Sends an email with a link, for resetting the password. * * @return bool whether the email was send */ public function sendEmail() { /* @var $user User */ $user = User::findOne([ 'status' => User::STATUS_ACTIVE, 'email' => $this->email, ]); if (!$user) { return false; } if (!User::isPasswordResetTokenValid($user->password_reset_token)) { $user->generatePasswordResetToken(); if (!$user->save()) { return false; } } return Yii::$app ->mailer ->compose( ['html' => 'passwordResetToken-html', 'text' => 'passwordResetToken-text'], ['user' => $user] ) ->setFrom([Yii::$app->params['supportEmail'] => Yii::$app->name . ' robot']) ->setTo($this->email) ->setSubject('Password reset for ' . Yii::$app->name) ->send(); } }
The model will send a confirmation to email for the password change. For this, it uses 2 layouts (html and text), we already have html, we need to add text. To do this, create a file /mail/layouts/text.php With the following content:
Also it is necessary to create 2 representations of the letter (html and text version). We will create an html version of the mail view, for this we create a file /mail/passwordResetToken-html.php with the following content:
<?php use yii\helpers\Html; $resetLink = Yii::$app->urlManager->createAbsoluteUrl(['site/reset-password', 'token' => $user->password_reset_token]);?> <div class="password-reset"> <p>Hello <?= Html::encode($user->username) ?>,</p> <p>Follow the link below to reset your password:</p> <p><?= Html::a(Html::encode($resetLink), $resetLink) ?></p></div>
And the view for text version /mail/passwordResetToken-text.php:
<?php$resetLink = Yii::$app->urlManager->createAbsoluteUrl(['site/reset-password', 'token' => $user->password_reset_token]);?>Hello <?= $user->username ?>,Follow the link below to reset your password:<?= $resetLink ?>
Model indicate as sender of e-mail from the parameter supportEmail, it must also be added. To do this, open the file /config/params.php for editing and add the element supportEmail to the array, you will end up with the following:
Next, the model for the form of password change /models/ResetPasswordForm.php with the following content:
<?php namespace app\models; use yii\base\Model;use yii\base\InvalidParamException; /** * Password reset form */class ResetPasswordForm extends Model{ public $password; /** * @var \app\models\User */ private $_user; /** * Creates a form model given a token. * * @param string $token * @param array $config name-value pairs that will be used to initialize the object properties * @throws \yii\base\InvalidParamException if token is empty or not valid */ public function __construct($token, $config = []) { if (empty($token) || !is_string($token)) { throw new InvalidParamException('Password reset token cannot be blank.'); } $this->_user = User::findByPasswordResetToken($token); if (!$this->_user) { throw new InvalidParamException('Wrong password reset token.'); } parent::__construct($config); } /** * @inheritdoc */ public function rules() { return [ ['password', 'required'], ['password', 'string', 'min' => 6], ]; } /** * Resets password. * * @return bool if password was reset. */ public function resetPassword() { $user = $this->_user; $user->setPassword($this->password); $user->removePasswordResetToken(); return $user->save(false); } }
Now we add actions to work with the models described above. Open the controller /controllers/SiteController.php in use add the created models and 2 actions (actionRequestPasswordReset and actionResetPassword):
<?php namespace app\controllers; //... use app\models\SignupForm;use app\models\PasswordResetRequestForm;use app\models\ResetPasswordForm; class SiteController extends Controller{ //... /** * Requests password reset. * * @return mixed */ public function actionRequestPasswordReset() { $model = new PasswordResetRequestForm(); if ($model->load(Yii::$app->request->post()) && $model->validate()) { if ($model->sendEmail()) { Yii::$app->session->setFlash('success', 'Check your email for further instructions.'); return $this->goHome(); } else { Yii::$app->session->setFlash('error', 'Sorry, we are unable to reset password for email provided.'); } } return $this->render('requestPasswordResetToken', [ 'model' => $model, ]); } /** * Resets password. * * @param string $token * @return mixed * @throws BadRequestHttpException */ public function actionResetPassword($token) { try { $model = new ResetPasswordForm($token); } catch (InvalidParamException $e) { throw new BadRequestHttpException($e->getMessage()); } if ($model->load(Yii::$app->request->post()) && $model->validate() && $model->resetPassword()) { Yii::$app->session->setFlash('success', 'New password was saved.'); return $this->goHome(); } return $this->render('resetPassword', [ 'model' => $model, } }
Next, for these two actions, you need to add views, start with the request form to change the password /views/site/passwordResetRequestForm.php:
<?php use yii\helpers\Html;use yii\bootstrap\ActiveForm; $this->title = 'Request password reset';$this->params['breadcrumbs'][] = $this->title;?> <div class="site-request-password-reset"> <h1><?= Html::encode($this->title) ?></h1> <p>Please fill out your email. A link to reset password will be sent there.</p> <div class="row"> <div class="col-lg-5"> <?php $form = ActiveForm::begin(['id' => 'request-password-reset-form']); ?> <?= $form->field($model, 'email')->textInput(['autofocus' => true]) ?> <div class="form-group"> <?= Html::submitButton('Send', ['class' => 'btn btn-primary']) ?> </div> <?php ActiveForm::end(); ?> </div> </div></div>
And the view for the password change form /views/site/resetPasswordForm.php:
The final touch, add a link to reset the password in the authorization form view, to do this, open the file /views/site/login.php add a link to reset password:
<div> If you forgot your password you can <?= Html::a('reset it', ['site/request-password-reset']) ?>.</div>
As a result, the view of authorization on the site will look like this:
<?php use yii\helpers\Html;use yii\bootstrap\ActiveForm; $this->title = 'Login';$this->params['breadcrumbs'][] = $this->title;?> <div class="site-login"> <h1><?= Html::encode($this->title) ?></h1> <p>Please fill out the following fields to login:</p> <?php $form = ActiveForm::begin([ 'id' => 'login-form', 'layout' => 'horizontal', 'fieldConfig' => [ 'template' => "{label}\n<div class=\"col-lg-3\">{input}</div>\n<div class=\"col-lg-8\">{error}</div>", 'labelOptions' => ['class' => 'col-lg-1 control-label'], ], ]); ?> <?= $form->field($model, 'username')->textInput(['autofocus' => true]) ?> <?= $form->field($model, 'password')->passwordInput() ?> <?= $form->field($model, 'rememberMe')->checkbox([ 'template' => "<div class=\"col-lg-offset-1 col-lg-3\">{input} {label}</div>\n<div class=\"col-lg-8\">{error}</div>", ]) ?> <div style="color:#999;margin:1em 0"> If you forgot your password you can <?= Html::a('reset it', ['site/request-password-reset']) ?>. </div> <div class="form-group"> <div class="col-lg-offset-1 col-lg-11"> <?= Html::submitButton('Login', ['class' => 'btn btn-primary', 'name' => 'login-button']) ?> </div> </div> <?php ActiveForm::end(); ?> </div>
As a result, we got a full functionality of authorization through the database, registration and reset of password in Yii2 basic using the functionality of the template of Yii2 advanced.
Authorization in Yii2 by e-mail instead of username
For authorization on the site, I prefer using the user’s e-mail as a login instead of a nickname, by default, yii2 uses a nickname as the login. To fix this is quite simple.
Let’s start with the /models/User.php model and add the findByEmail method to search for the user by e-mail:
public static function findByEmail($email){ return static::findOne(['email' => $email, 'status' => self::STATUS_ACTIVE]);}
Next, in the model /models/LoginForm.php change the $username property to $email in the rules method, add e-mail handling of rule [[’email’], ’email’] and in the getUser () method, change the User::findByUsername($this->username) to User::findByEmail($this->email), this is what you get:
<?php namespace app\models; use Yii;use yii\base\Model; /** * LoginForm is the model behind the login form. * * @property User|null $user This property is read-only. * */class LoginForm extends Model{ public $email; public $password; public $rememberMe = true; private $_user = false; /** * @return array the validation rules. */ public function rules() { return [ // username and password are both required [['email', 'password'], 'required'], [['email'], 'email'], // rememberMe must be a boolean value ['rememberMe', 'boolean'], // password is validated by validatePassword() ['password', 'validatePassword'], ]; } /** * Validates the password. * This method serves as the inline validation for password. * * @param string $attribute the attribute currently being validated * @param array $params the additional name-value pairs given in the rule */ public function validatePassword($attribute, $params) { if (!$this->hasErrors()) { $user = $this->getUser(); if (!$user || !$user->validatePassword($this->password)) { $this->addError($attribute, 'Incorrect username or password.'); } } } /** * Logs in a user using the provided username and password. * @return bool whether the user is logged in successfully */ public function login() { if ($this->validate()) { return Yii::$app->user->login($this->getUser(), $this->rememberMe ? 3600*24*30 : 0); } return false; } /** * Finds user by [[email]] * * @return User|null */ public function getUser() { if ($this->_user === false) { $this->_user = User::findByEmail($this->email); } return $this->_user; } }
Finally, in the /views/site/login.php view, change the username field to email:
>>> import sys >>> print(sys.version) '3.6.0 |Anaconda 4.3.1 (64-bit)| (default, Dec 23 2016, 12:22:00) \n[GCC 4.4.7 20120313 (Red Hat 4.4.7-1)]'
1
2
3
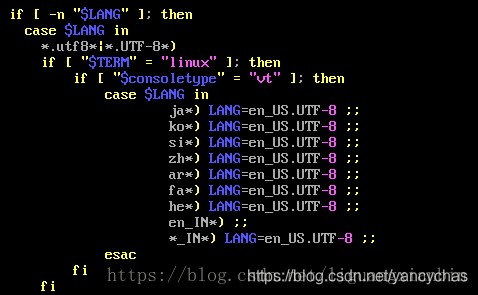
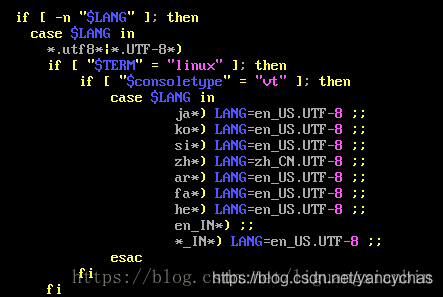
问题描述
今天在使用python3的时候,报错信息
Traceback (most recent call last): File "tmp.py", line 3, in <module> print(a) UnicodeEncodeError: 'ascii' codec can't encode characters in position 0-1: ordinal not in range(128)
1
2
3
4
报错代码可简化为
a = b'\xe5\x94\xb1\xe6\xad\x8c' a = a.decode("utf-8") print(a)
This tutorial will guide you through installing Python 3 on a CentOS 7 system using the Software Collections (SCL) alongside the distribution default Python version 2.7. We will also show you how to create a Python virtual environment.
Python is one of the most popular programming languages in the world. With its simple and easy to learn syntax Python is a great choice for beginners and experienced developers. Python is a quite versatile programming language, you can use it to do almost anything you want, write small scripts, build games, develop websites, create machine learning algorithms, analyze data and more.
Many popular applications and websites including YouTube, DropBox, Reddit, Quora, Instagram, Pinterest have been developed using Python.
While Python 2 is well-supported and active, Python 3 is considered to be the present and future of the language.
Software Collections, also known as SCL is a community project that allows you to build, install, and use multiple versions of software on the same system, without affecting system default packages. By enabling Software Collections you will gain access to the newer versions of programming languages and services which are not available in the core repositories.
CentOS 7 ships with Python 2.7.5 which is a critical part of the CentOS base system. SCL will allow you to install newer versions of python 3.x alongside the default python v2.7.5 so that system tools such as yum will continue to work properly.
In order to enable SCL we need to install the CentOS SCL release file. It is part of the CentOS extras repository and can be installed by running the following command:
Now that we have access to the SCL repository we can install any Python 3.x version we need. Currently, the following Python 3 collections are available:
Python 3.3
Python 3.4
Python 3.5
Python 3.6
In this tutorial we will install Python 3.6 which is the latest version available at the time of writing. To do so type the following command on your CentOS 7 terminal:
After the package rh-python36 is installed, check the Python version by typing:
python --version
Copy
Python 2.7.5
Copy
You will notice that Python 2.7 is the default Python version in your current shell.
To access Python 3.6 you need to launch a new shell instance using the Software Collection scl tool:
scl enable rh-python36 bash
Copy
What the command above does is calling the script /opt/rh/rh-python36/enable which changes the shell environment variables.
If you check the Python version again, you’ll notice that Python 3.6 is the default version in your current shell now.
python --version
Copy
Python 3.6.3
Copy
It is important to point out that Python 3.6 is set as the default Python version only in this shell session. If you exit the session or open a new session from another terminal Python 2.7 will be the default Python version.
Python Virtual Environments allows you to install Python modules in an isolated location for a specific project, rather than being installed globally. This way you do not have to worry about affecting other Python projects.
The preferred way to create a new virtual environment in Python 3 is by executing the venv command.
Let’s say we want to create a new Python 3 project called my_new_project inside our user home directory and matching virtual environment.
First, create the project directory and switch to it:
mkdir ~/my_new_projectcd ~/my_new_project
Copy
Activate Python 3.6 using the scl tool:
scl enable rh-python36 bash
Copy
From inside the project root run the following command to create a virtual environment named my_project_venv:
python -m venv my_project_venv
Copy
To use the virtual environment first we need to activate it by typing:
source my_project_venv/bin/activate
Copy
After activating the environment, the shell prompt will be prefixed with the name of the environment:
(my_project_venv) user@host:~/my_new_project$
Copy
Starting with Python 3.4, when creating virtual environments pip, the package manager for Python is installed by default.
You should now have Python 3 programming environment setup on your CentOS 7 machine and you can start developing your Python 3 project.
You can also read about how to Install Odoo 11 on CentOS 7 and see an example of how to use Python 3 virtual environment to run Python software on a CentOS 7 server.
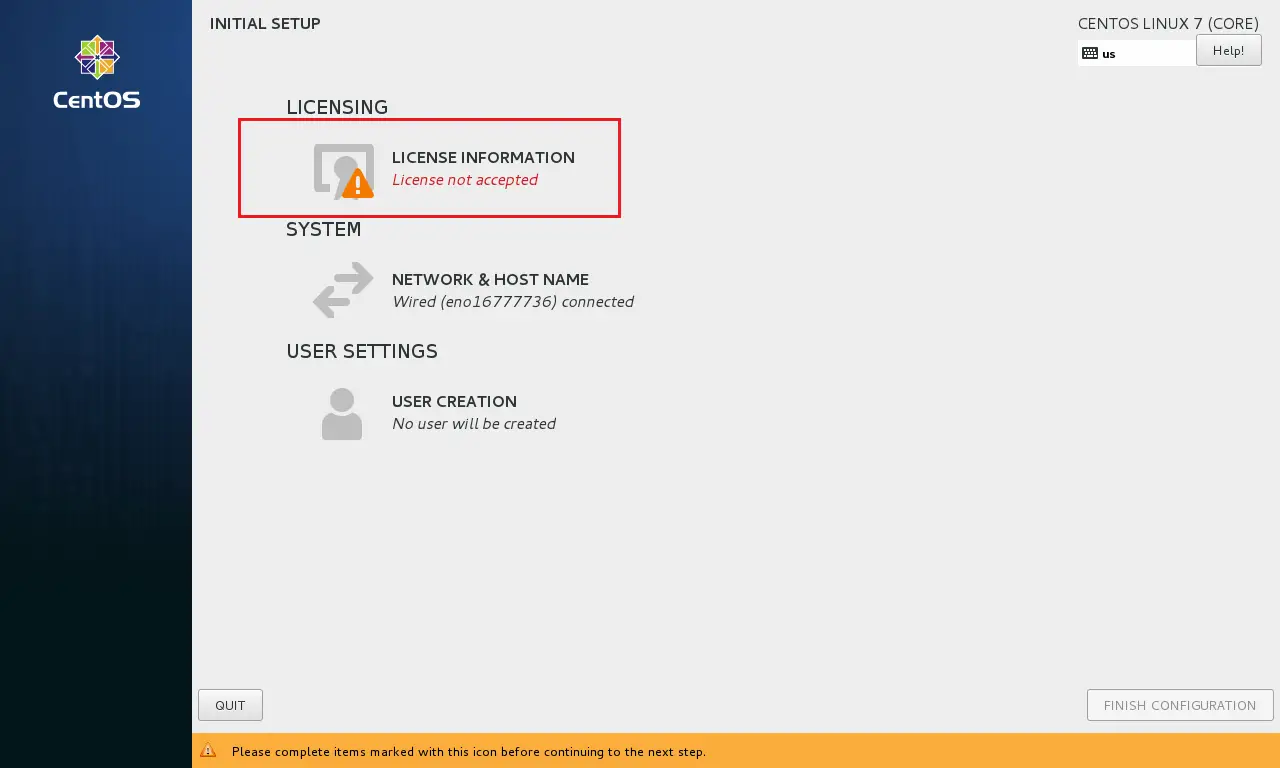
Linux admins spend most of their time on working in a terminal; there are some who like to work on GUI instead of a terminal. By default, CentOS 7 installed as the minimal server, and user intervention is required to change the installation type. This guide will help you to install GUI on CentOS 7 on the top of the minimal server installation.
Before installing GUI, make a Local Yum Repository to avoid downloading packages from the internet.
Optional: Run the following command to list down the available package groups for CentOS 7.
# yum group list
Output:
Loaded plugins: fastestmirror
There is no installed groups file.
Maybe run: yum groups mark convert (see man yum)
Loading mirror speeds from cached hostfile
Available Environment Groups:
 Minimal Install
 Compute Node
 Infrastructure Server
 File and Print Server
 Basic Web Server
 Virtualization Host
 Server with GUI
 GNOME Desktop
 KDE Plasma Workspaces
 Development and Creative Workstation
Available Groups:
 Compatibility Libraries
 Console Internet Tools
 Development Tools
 Graphical Administration Tools
 Legacy UNIX Compatibility
 Scientific Support
 Security Tools
 Smart Card Support
 System Administration Tools
 System Management
Done
Step 1: Install Gnome GUI packages using the YUM command.
Step 2: Enable GUI on system startup. In CentOS 7 / RHEL 7, systemd uses “targets” instead of runlevel. The /etc/inittabfile is no more used to change run levels. So, issue the following command to enable the GUI on system start.
xrdp is an Open Source Remote desktop Protocol server, which allows you to RDP to your Linux server from Windows machine; it is capable of accepting connections from rdesktop, freerdp, and remote desktop clients.
By default, xrdp service won’t start automatically after a system reboot. Run the following command in the terminal to enable the service at system startup.
systemctl enable xrdp
Firewall
Configure the firewall to allow RDP connection from external machines. The following command will add the exception for RDP port (3389).
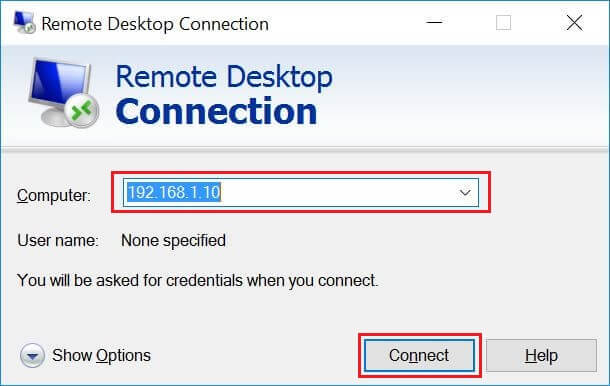
Now take RDP from any windows machine using Remote Desktop Connection. Enter the ip address of Linux server in the computer field and then click on connect.
Install xrdp on CentOS 7 – Enter IP Address in Remote Desktop Connection Window
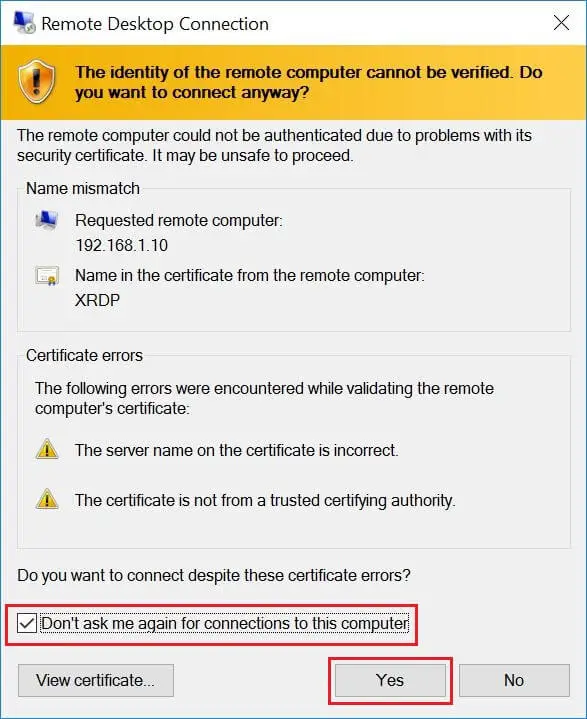
You may need to ignore the warning of RDP certificate name mismatch.
Install xrdp on CentOS 7 – Accept the Certificate
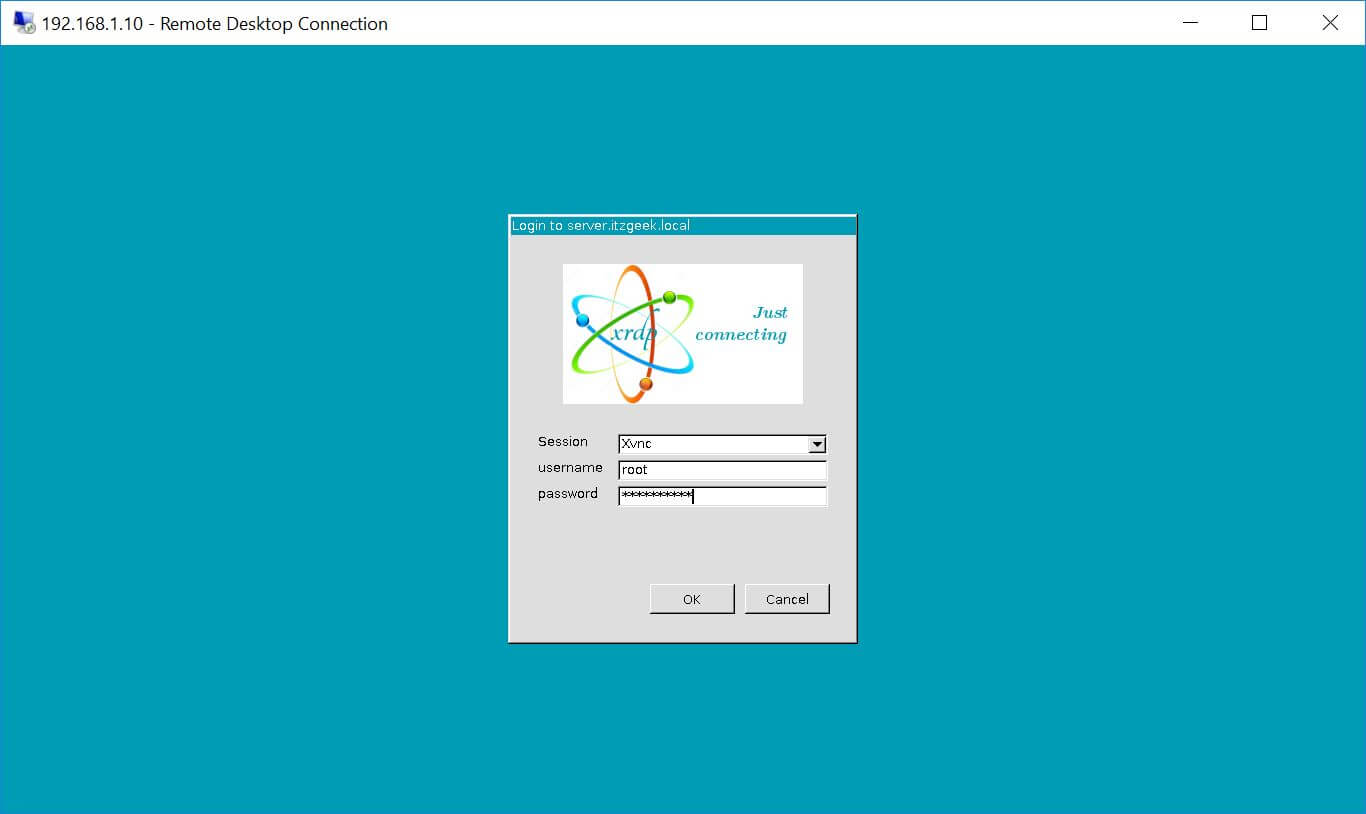
You would be asked to enter the username and password. You can either use root or any user that you have it on the system. Make sure you use module “Xvnc“.
Install xrdp on CentOS 7 – xrdp Login Page
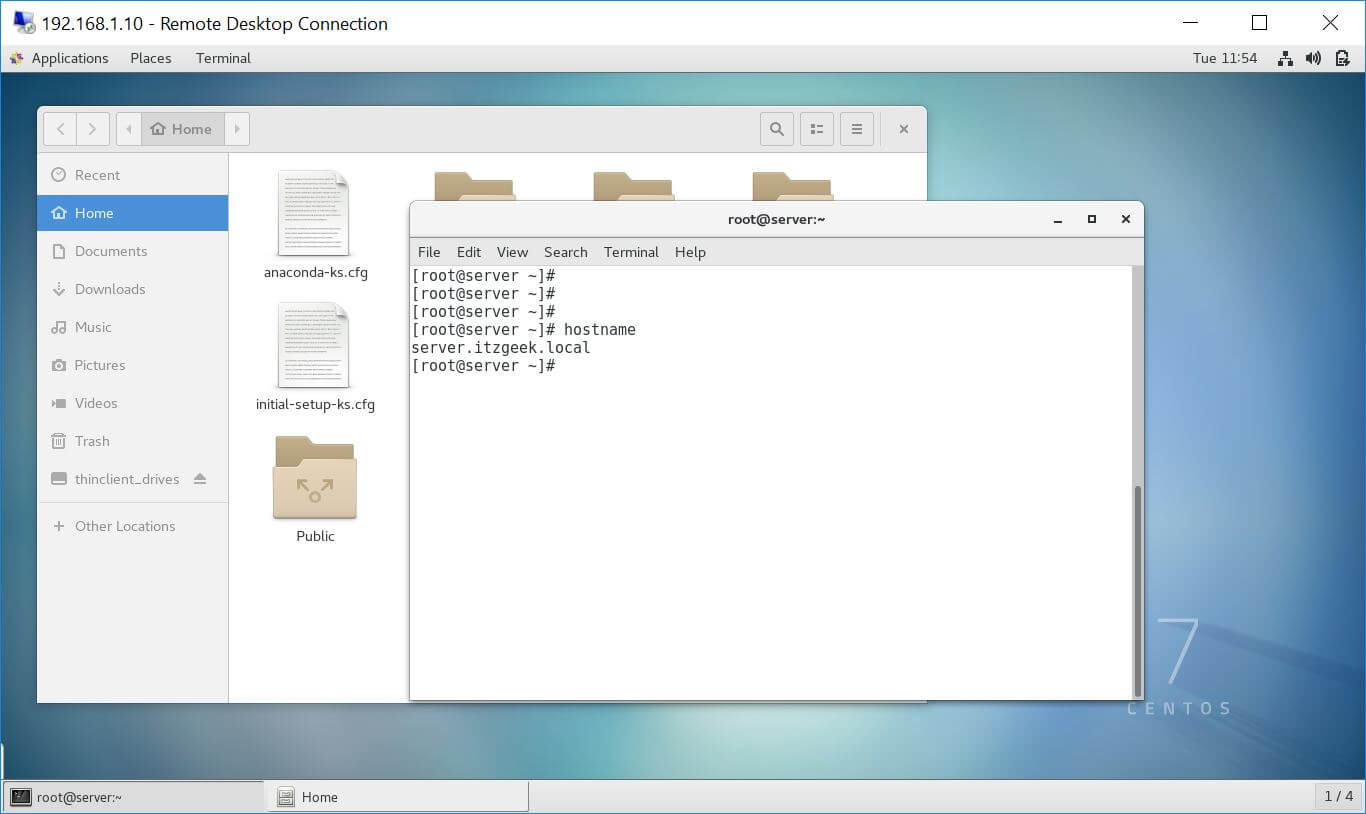
If you click ok, you will see the processing. In less than a half minute, you will get a desktop.
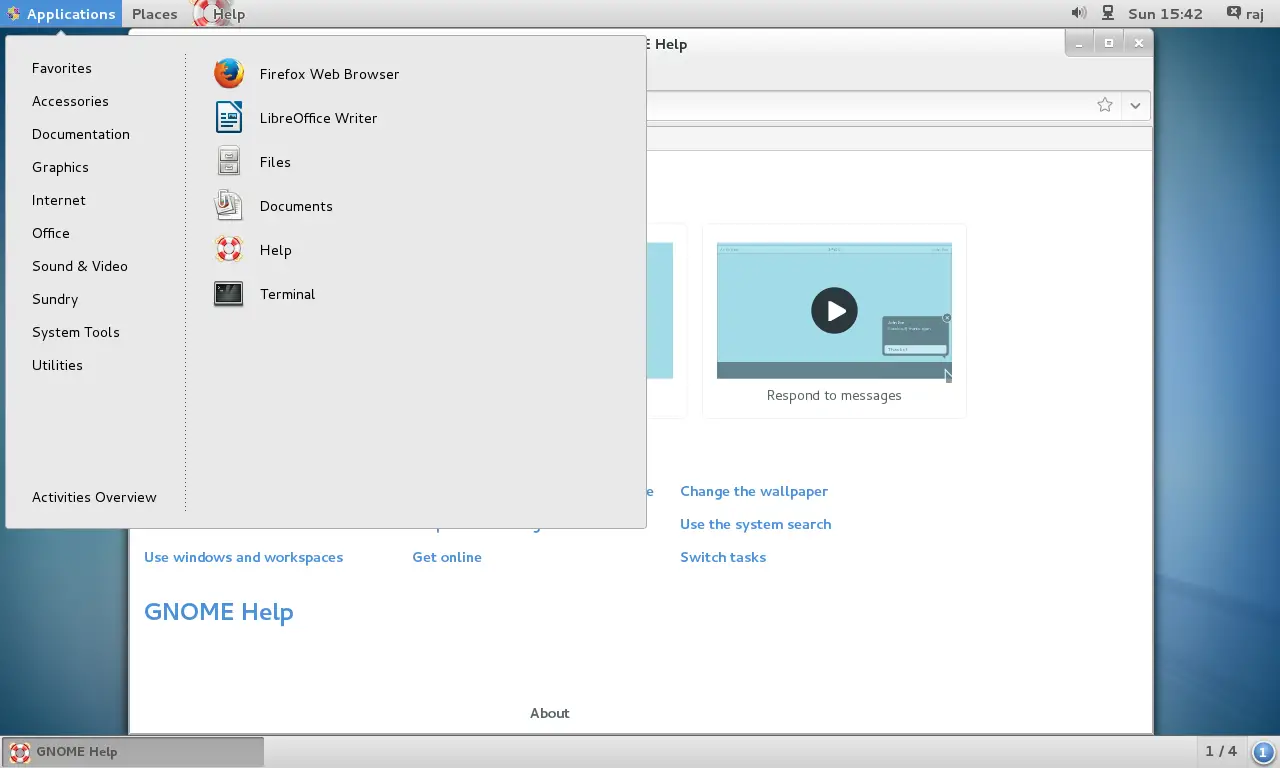
Install xrdp on CentOS 7 – xrdp CentOS Desktop
That’s All. You have successfully configured xRDP on CentOS 7 / RHEL 7.